This article is intended to build on Scot Baston’s excellent Tip Squirrel article, not to rehearse ground already covered there. I want to cover a few alternatives, and touch on why they might be useful, and look in detail at a slightly less obvious application of tethering.
The first thing to point out about tethering in general is that it does not necessarily involve a cable, with the new Nikon D4 operating on a WIFI tether through its built-in web server and full control at the one extreme, and at the other the wireless capture possible through the Canon battery Grp or the Eye-Fi memory card. For most purposes however the wired tether remains the only really practicable option, and is usually significantly faster than any WiFi options
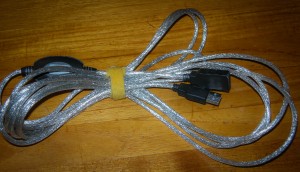
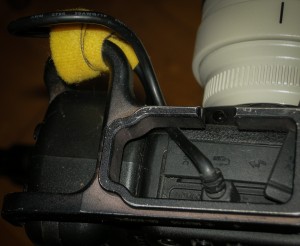
So the first thing one needs is a USB cable, swiftly followed by a USB regenerating extension cable, such as the one shown which I bought from eBay 3 years ago. One needs the regenerating extender because without that the maximum length one can use is 15′ (5m). Next useful and slightly non-standard bit of kit in the low profile USB cable one wants to fit in under one’s ‘L’ bracket it’s described as “USB A male to up angled mini B male” (or vice versa) the up angled mini B takes the cable in at right angles through the gap in my bracket rather than interfering with the portrait mounting ‘L’ plate. Quick Tip: fold your long cable rather than coiling it up. That way you avoid introducing a twist to it and will not have to unkink it. Hook and lop cable ties are very useful for keeping things tidy.
Many people will have seen Frank Doorhof or Scott Kelby demonstrating the wonderful “Tether Tools” kit for holding the laptop and the cable snags to stop the USB plug being wrenched from & damaging one’s camera, and some discussion on preventing the USB cable coming apart. I think that one would be wise leaving the cable to be pulled apart, as that avoids trips and things being pulled over. It is desirable to have cable snags at computer and camera to protect those vulnerable ports, but have a relatively loose couple in the middle, that will pull apart when someone falls over it. This will have the disadvantage that you will have to set up the communications again, but that is a small price for not pulling over your tripod and camera, and dragging the laptop off it’s work surface.

The USB cable isn’t everything of course, one needs some software to drive the connexion. Canon cameras come with an extensive remote control suite, whereas for Nikon it’s an additional package such as the seriously expensive Capture NX2. Lightroom has a built in remote capability which addresses this to a certain extent but the control available is frankly poor, the trigger function is there, but that’s all, there is no access to even the simple exposure controls beyond displaying what is currently set. Where the Lightroon tethering really wins is for use by a Photographer who is using the camera hands-on, and does not need to make semi-remote adjustments. Like all tethering software the system responds to manual triggering and copies the image back to the laptop from the camera whenever the shutter is pressed.
Where more control is needed I’ve found On One’s Software’s DSLR Camera Remote HD for the iPad to be the most useful complete remote triggering package, as it addresses lots of the issues left open by other packages, and at reasonable cost. There is also a slightly cut down version for the iPhone, mostly what is missing is the video. It integrates very well with Lightroom’s Watch Folder auto-import feature, but will work equally well just importing to a selected folder, again it responds to manual shutter activation, and all photos get copied to the computer. The rest of this article will be about using DSLR Camera Remote.
NB There is a similarly named package “DSLR Remote for Mac” from Breeze software which seems to only address Canon DSLRs. I have no experience with this package, so cannot commend it, please don’t confuse them.
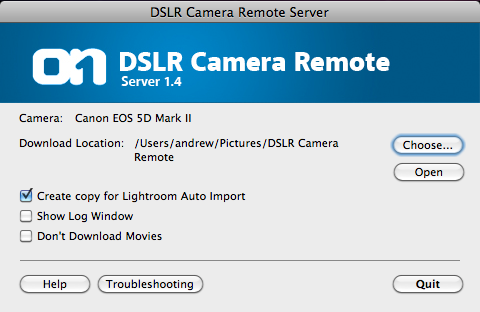
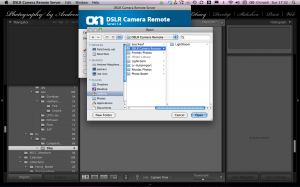
In operation one starts a server package on the laptop. This handles communication – it will set the camera iso/aperture/shutter/white balance copy the captured images back to the computer, and move them into a “Watch Folder” if required in an atomic operation to prevent partially copied files being detected and misread. It is driven by the control panel on the iDevice, and also copies the images to the iDevice for (zoomable) review.
Setting up Lightroom is equally easy, as these 2 screen captures illustrate:
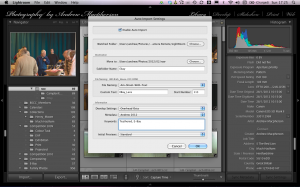
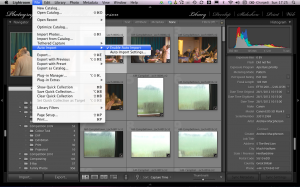
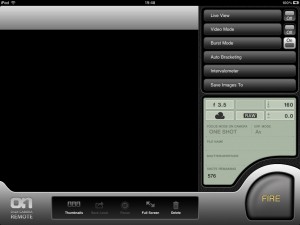
There is a real bonus, it’s not necessary to have a WiFi network in place on site, or bring along a Mi-Fi unit: an ad-hoc net between laptop and iPad is all that’s needed, so the whole thing will operate on location, even on battery in the open. I’ve used it successfully in a Village Hall, and at a fete.
The iDevice control panel for the server links with WiFi from one’s iPad or iPhone, giving full control of all the usual camera menu options, Aperture, Shutter Speed, ISO, and white balance, also a set of add on functions, such as choosing whether to save images to the camera’s flash card as well as the computer (a good idea), the ability to make a much wider set of exposure brackets with iso, time or aperture bracketing, not limited by the camera’s built in spread and exposure count. One also has the ability to program a time lapse sequence.
Full control needs the camera to be set in such a way as to allow that control to be exercised — if not you will be prompted to put it in Manual mode:
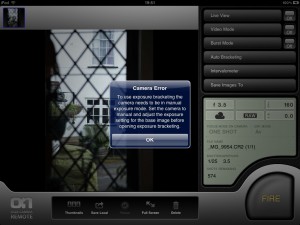
DSLR Camera Remote HD displays the captured image on the iPad to allow one to take advantage of the much larger screen for review (and it can be zoomed for a detail view) yet still position the laptop so the client or sitter can see what’s being captured. It will also display video and live view allowing one to compose and focus a shot when it’s difficult to get behind the viewfinder. You can also save the image to the “Camera Roll” on your iDevice, for a quick retouch and share.
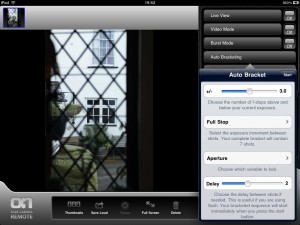
My biggest use for tethered capture is for putting the camera hard against a room wall to show the space off to best advantage, and get an extended bracket to illustrate interior and exterior views simultaneously. I would really like a version that connects directly, or via another iDevice to avoid having to take a laptop on location, but when one is taking strobes to put outside in the garden to simulate a sunny day inside (this is Britain after all) the laptop is the least of one’s kit worries.
Related Posts
- Macro and short depth of field
- For want of a nail — a belated review of the TrekPod Go
- Help my menu settings keep vanishing!
- So… What is “Pro” a code for?
- Photo Selection Slideshows
- Eye-Fi vs Shooting Tethered
- YN565 E-TTL Flash Speedlite fails with Canon ST-E2
- Another Speedlight replacement
- Seasonal Toys & Games
- Pixel Wired Off-Camera Extender
- Tethering (Continued)
- New 5D3 with BG-E11, unboxing and first impressions
